LET STUDENTS HEAR TEXT READ OUTLOUD: TEXT-TO-SPEECH EXTENSIONS

Print Friendly, PDF & Email

TEXT-TO-SPEECH tools have proven beneficial not only for learners with diverse needs for support including dyslexia, hearing or speech impairments, selective mutism or pronunciation difficulties.  TEXT-TO-SPEECH tools also support learners wanting to improve  their literacy skills engaging their auditory intelligence or those who describe themselves as auditory learners.

Yes, the voices might sound synthesized and, yes, there is no or very limited emotion in the text read out. However, I still think that we should focus on what can be achieved with these tools rather than complain about their limitations. There are plenty of TEXT-TO-SPEECH tools including desktop downloads or extensions. Some require hightlighting the text to be read or pasting into special boxes. But, is it possible to have the text read outlod while browsing the web? Have a look at the three:

INTELLIGENT SPEAKER 

It allows you to clip website you are on and play the content. Listen to the recording (fast-forward to 0.20 sec if in a hurry ):

Unfortunately, the basic program gives you only 1 hour of listening a month so, maybe, it would be a good idea for some learners to invest in a Premium version and get the following:

  • Human-like voice and real-life emotions, breathing (if you want)
  • Automatic text detection on web and local HTML
  • 20 available languages
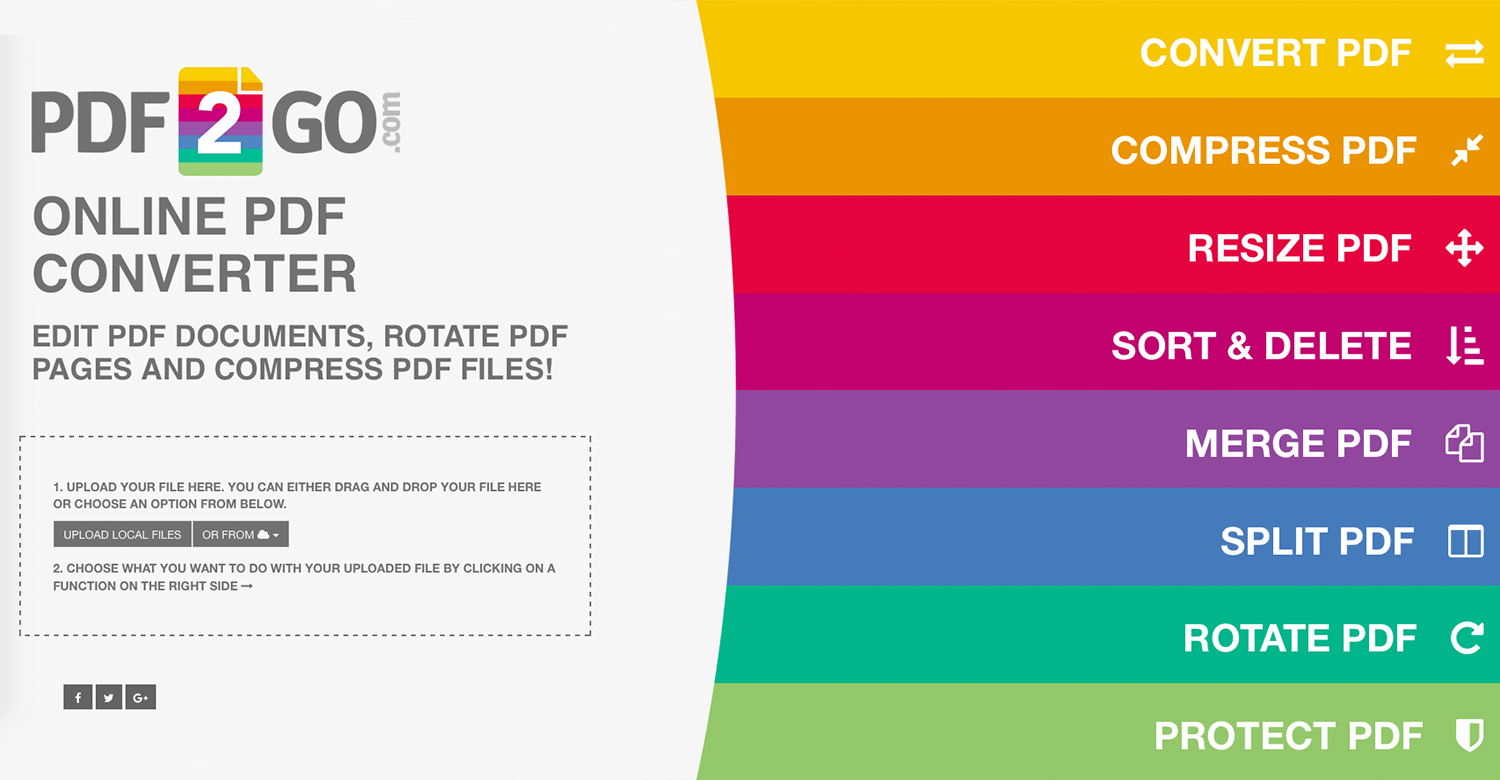
  • Google Docs, upload txt, docx, pdf
  • Synthesized audio is downloadable
  • Ability to listen offline (when was added online – we cache it)
  • Speed range which suits everyone 1

More on how to use the extension here.

qimono / Pixabay

READ ALOUD

My favourite text-to-speech tool. It’s very simple but sometimes it is the simplicity that wins. It reads websites and documents in different formats (pdf, doc). Unfortunately, you can’t download an audio of your recording.

Listen to the recording.

More on ReadAloud here.

Finally, TALKIE extension.

qimono / Pixabay

You need to select the desired text first. The program is fast and simple. The voice is quite nice to listen to. It reads websites and pdfs and word docs. It doesn’t read Google docs though. For £15.99 a year you can have Talkie Premium which gives you far more options such as a range of voices, speed or pitch.

Listen to the recording:

More on Talkie basic here.

Let your students choose!


  1. This is footnote https://intelligent-speaker.com/

ANYBODY UP TO PROFESSIONAL DEVELOPMENT WITH ADOBE FREE COURSES????

Print Friendly, PDF & Email

geralt / Pixabay

Professional development with ADOBE? For FREEEEE?

“Choose from dozens of free collaborative courses, taught by educators for educators, to learn how to integrate creativity into your curriculum and take your skills to the next level.” 1

The only thing you have to do is to create a free Adobe ID (Adobe Account). You can do it HERE

Some of these courses might seem more useful than the others. Below the table, you can find how I am planning to utilise the skills I will, hopefully, develop on my English classes.

Certifying Adobe Skills in the Classroom You’ll explore the value of the Adobe Certified Associate (ACA) program, and learn how to integrate Adobe certification into your curriculum. Self – paced
Get Started with Publishing using Adobe InDesign Learn the basics of publishing; create and teach students to create business card, students ID cards, e-documents; photo books, e-books and many, many more. Self – paced

60 Second Documentaries with Adobe Premiere Rush

Learn how to incorporate 60 second documentaries in your curriculum 10 hours; From  September 9, 2019  and runs until October 4, 2019
Photojournalism Learn the basics of photojournalism to create amazing photographic stories 10 hours, COURSE BEGINS JUN 24, 2019
Podcasting Learn the technical skills to create your own podcasts with Adobe Audition 10 hours, COURSE BEGINS JUN 10, 2019
Publishing for Educators using Adobe InDesign Learn how to teach your students the design and technical skills they need to use digital publishing in their projects. Start publishing yourself 😊 25 hours;  The course opens on June 3, 2019 and runs until July 19, 2019
Video for Educators Learn to create your  create your own video projects with Adobe Premiere Pro and Adobe After Effects The course opens on  April 1, 2019 and runs until May 17, 2019
Explainer Videos Learn the technical skills to create your own explainer videos with Adobe Premiere Rush 10 hours, COURSE BEGINS MAY 27, 2019
Spark Train the Trainer Lear how to successfully design and deliver effective professional development with Adobe Spark. Create your own CPD and share with colleagues. 15 hours, STARTS APR 29, 2019
Train the Trainer Level 1, 2 and 3 Gain the knowledge and skills to successfully design and deliver effective professional development with Adobe tools. 10, 30 and 35 hours respectively; The course opened on February 4, 2019 and runs until May 3, 2019
Infographics in Adobe Illustrator Learn how to create infographics. 10 hours; The course opens on April 15, 2019 and runs until May 10, 2019
Visual Effects for Educators using Adobe After Effects  The technical skills to create your own visual effect projects and  gain a collection of teaching materials for use with your students 25 hours; advanced; STARTS JAN 21, 2019
Mobile Photography for Educators using Adobe Lightroom CC How to enhance your programme with elements of mobile photography 25 hours; COURSE BEGINS SEP 23, 2019


Get Started with Publishing using

Adobe InDesignFOR Educators using Adobe InDesign

With my students: posters,  digital magazines, eBooks.

As a teacher: interactive pdfs with lesson plans

60 Second Documentaries with Adobe Premiere Rush

With my students: create a road show


Photojournalism With my students: digital stories; interactive articles
Explainer Videos

With my students: how-to video clips

As a teacher: how-to video clips with instructions on a range of programs or projects

Infographics in Adobe Illustrator

With my students: infographics; charts; posters

As a teacher: infographics; classroom rules;

Mobile Photography for Educators using Adobe Lightroom CC With my students: digital stories; interactive articles; writing on “DESCRIBE….” …


STUDENTS and TEACHERS can save 65% on Creative Cloud. CHECK THIS OUT. 


Let your students get VISUAL

Print Friendly, PDF & Email

Let your students get VISUAL using: ADOBE SPARKS, LUCIDPRESS and GOOGLE DRAWINGS

FirmBee / Pixabay


Together with my students I decided that the product of a series of lessons on DIGITAL CITIZENSHIP (see this post) will be a visual (poster, leaflet, flyer) with DOs and DON’Ts. Although there is a number of very good tools, we decided on a choice of four.

Below a wee overview and a selection of students’ work.

ADOBE SPARKS GOOGLE DRAWING

a short introductory clip from Lynda.com on what Adobe Sparks is. You can enrol for the whole course.

Watch a short tutorial by Richard Byrne:


 have a look how Jen Jonson created a beautiful infographics in google drawing

easy, fast, efficient, user super-friendly, FREE option is more than enough for your classwork

VIDEOS: your students can upload videos, add text , icons, music or voice without any sophisticated skills 🙂


in-house G-drive app; you can create: diagrams, posters, drawings; mindmaps, or concept maps;

good for individual work as well as collaborative project

FOR TEACHERS: just ditch a coursebook (joking) and prepare your own dynamic interactive lessons including videos for

example.

CANVA LUCIDPRESS 

a tutorial on how to use Canva – one of the best tools for any visuals

A drag-and-drop tool enabling you to produce wonderful visuals. Available as a stand-alone desktop tool or an in-built app (in G-Drive).

absolutely fantastic program using a drag-and-drop format, full of free icons, banners, templates, pictures, you name it. FREE version is enough;

a piece of advice: apparently, not good if you want to create a trademark and use it. Copyright issues. But for school use it is absolutely fine. If you want to find out more about legal issues, read an article by N. Styles here.

You can produce brochures, leaflets, banners as well as documents such as CVs, magazines or certificates.  FREE option full of templates, icons or images.

VERDICT: 


SPARKS – gold medal for the VIDEO creation tools and for the fact that is is really FREE !!!!!!!!!!!!!!!!

CANVA – gold medal for fantastic tools for static iamges/visuals

GOOGLE DRAWINGS – gold medal just because it’s google (joking,joking) – for simplicity and collaboration option

LUCIDPRESS – gold medal for simplicity and wide range of free tools

Below, simple visuals created by my students on DIGITAL CITIZENSHIP 


SCREENCASTIFY  FOR QUICK SCREEN RECORDING

Print Friendly, PDF & Email

TOOLS FOR SCREEN RECORDING:

In the process of planning a class project on DIGITAL CITIZENSHIP: DOs & DON’Ts which involved designing visuals (infographics, flyers, posters etc.), I decided that some of my students might benefit from more assistance/advice on which tools/programs to use and how to use them.

As time was (and always is) of the essence (15 minutes between my classes), I prepared very short video clips demonstrating quickly and without elaborate explanation, how to navigate inside these programs, using SCREENCASTIFY.  


Please, have a look at the three short video clips done in no more than 15 minutes. No special equipment, no need for installing desktop tools. Just a chrome extension. FREE VERSION of the program.

And finally, a screencast (at the bottom) of you actually can do inside screencastify.

You can:

  • share (see the image) on Youtube or G-Drive
  • download your clip
  • get a shareable link
  • embed to any blog/website etc.
  • edit
  • let others post comments

A short overview from https://www.screencastify.com

PDF splitter, merger, converter and ….. you name it :)

Print Friendly, PDF & Email

IF YOU WANT TO EDIT PDF DOCUMENT

split, merge, convert word to pdf etc.

Excellent ONLINE  tools for editing pdf (splitting, merging, converting to word/jpg/ppt etc). I use them mainly for splitting pdf when I need specific pages of a document but the programs offer you many more features.

THE WINNER is (in my opinion 😊) https://smallpdf.com/

3dman_eu / Pixabay

My favourite tool.

the image taken from smallpdf.com

It’s proved to be very useful especially when I need just a specific page/pages. It does everything!!!!!! It features absolutely beautiful interface and  gives you a really good preview of the document so it’s easy to choose the pages. If you convert a pdf into word, it gives you a nice document almost identical to a pdf original. BUT! You’re limited to 2 DOCUMENTS PER HOUR. Or, if you want to be cheeky, you can use chrome for first to actions and then explorer or firefox. It really works!

ALTERNATIVES: 

If you don’t have access to other devices, you can use other programmes. They are FREE, almost as FRIENDLY  as smallpdf. And, they don’t have a lot of restrictions.

qimono / Pixabay

ILOVEPDF 

images taken from www.ilovepdf.com and https://www.iloveimg.com/

As it reads on the site, it gives you a full range of pdf tools. ” All are 100% FREE and easy to use! , split, compress, convert, rotate, unlock and watermark PDFs with just a few clicks”. When you merge a pdf, the preview is fantastic. The split preview is not as good though. Plus, you need to know the number of pages you want to split. And, surprise surprise, I found out today that there is a twin program for editing images https://www.iloveimg.com/ 

PDF2GO

IMAGE TAKEN FROM https://tools4me.tumblr.com/


Very similar to smallpdf. Basic version is more than enough. Although still relatively straightforward, it is a bit less user friendly.


PDFCANDY –  similar to pdf2go but offers more tolls e.g. htm to pdf or pdf protection. Click a video and see foryourself how robust this program is. 

CLEVERPDF

Its offer is more limited that the tools described above. Although it looks very simple and elegant, its split previews are not as good as smallpdf or others. Watch the video and see what it offers.


Why we should use INFOGRAPHICS

Print Friendly, PDF & Email

FirmBee / Pixabay

INFOGRAPHIC is a visual representation/interpretation of factual data, knowledge or informative text. The benefits of infographics in classroom are obvious. They are visually attractive and engaging and make sometimes dry content more “digestible”. They encourage students’ critical thinking and help develop their digital competencies. They can be used by students and teachers in a range of ways – for creating timelines or personal profiles, for promoting, advertising and raising awareness or for demonstrating and interpreting factual information, just to name a The pdf document below was created in three different programs – canva, pikchart and, my favourite – easel.ly. The three last pages show work done by students in easel.ly.

[embeddoc url=”https://bwernervocalise.edublogs.org/files/2018/11/0.-pikchart-converted-merged-3-1aidr1n-1yn5ruh.pdf” download=”all” viewer=”google” cache=”off”]

FLIP YOUR CLASSROOM

Print Friendly, PDF & Email

Before we go on a fully deserved summer break, please, let me share with you a couple ideas that you might find useful if you are thinking about enhancing your classes with the use of technology without spending too much time on it. On the contrary, you will save time doing that. And this is only a taster without going into detail how to use these programs.

HYBRID (or BLENDED) TEACHING/LEARNING is the answer.


Ask yourself a question –

What type of classes do I teach?


Class sessions take

place 100% in a traditional classroom. Technology is hardly ever used.


face
2face model

Class sessions take place in a traditional classroom,

but technology is used to facilitate activities, deliver content,

and/or assess students.

Web-Enhanced/

Blended model

Internet-based activities comprise more than 50%

of the content and instruction

HYBRID MODEL
Nearly all or all instruction, interaction, and activities take place online Online model

MORE HERE

The technique that works very well for both – hybrid and blended models, is FLIPPING a class. Instead of teaching them and asking to practise at home, you ask them to learn/get familiar with the content independently and practice will take place in class.  

Watch a short video explaining what a FLIPPED CLASS/CLASSROOM is.

There are tons of tools for flipping your lessons. I would like to encourage you to familiarise with the three. This is how I rate them but it is entirely my opinion. Plus, the more you practise with the program, the more you like or dislike it so these stars might look different in the future 🙂  

***** Blendspace

**** Google Classroom

** Tacck

I prepared the same set of tasks that NC4 students will have to do before our 1st meeting at college in these three programs. Please, ignore the content (dates, names of teachers, the quiz is short just for demonstration).

BLENDSPACE – this is what it looks like and you can access the class HERE.  It’s, basically speaking, the work that you want your students to do before a face2face class.

PLUSES:

  • You can attach document in Word, pdf or directly from G-drive as google docs
  • You can attach images in various formats
  • You can attach links to videos, images, documents without worrying about breaching COPYRIGHT
  • You can make short quizzes

More about BLENDSPACE

Google CLASSROOM – it is a bit similar to Moodle but more intuitive and more visually attractive.

Here is what it looks like – a 9-second clip

QUESTIONS – students will be able to post their answers and/or comment on other answers

ASSIGNMENTS – it’s basically what you want students to do as preparation for next classes or homework. You will be able to see who did and who didn’t submit the assignment. You will be able to comment on students’ work and give them grades/marks.

ANNOUNCEMENTS – it is basically speaking communication with students, passing messages, reminding of things

PLUSES:

  • You can attach document in Word, pdf or directly from G-drive as google docs
  • You can attach images in various formats
  • You can attach links to videos, images, documents without worrying about breaching COPYRIGHT
  • You can comment on and grade students’ work
  • You can schedule your posts (you can prepare them earlier and set the date they will be visible for students)


I’m still discovering new features of Google Classroom so maybe soon it will be a 5-star platform 🙂

There are a lot of google classroom tutorials so, please, watch this short clip to see what it offers.

TACCK – you can access it here

As you will notice, I couldn’t upload pdf or word documents. Also, when I tried to upload an image, I kept getting messages about no space.

It’s a brilliant tool for creating presentations for example. I’m still finding out about its features.


So, have a look and enjoy. And if this seems overwhelming a bit, why don’t you try creating your own simple flip using TEDEd. Find a video, create a series of questions and flip it!!!!! I haven’t used this program myself but I used mini lessons prepared by others. For example this one about pronouns me, myself and I  

Thank you,

Beata

TOOLS useful for PBL lessons.

Print Friendly, PDF & Email

PADLET

Created with Padlet

PADLET is a fantastic and  extremely simple tool that I have been using for several of years with all classes I teach, but especially NC4 YL. It is one of these tools that you can never get bored with. PADLET is excellent for both individual and group tasks. It works like a sheet of paper where you can put anything (images, videos, documents, text) anywhere, from any device (pcs, tablets, phones).

What did I use PADLET  for with my students:

Click on the title.

  1. For saying HELLO to each other 
  2. For expressing opinions about Brexit (speaking)
  3. For reflecting on QUOTES FROM SHAKESPEARE
  4. For talking about EXTINCT LANGUAGES
  5. For writing RESTAURANT RECOMMENDATIONS
  6. For writing HAIKU
  7. For writing RECIPES
  8. For writing about TRADITIONS
  9. For writing about WORK PLACEMENT

and many more.

Below, a short overview how to use it in a video by Richard Byrne (technology in teaching guru).

POPPLET

Popplet is a free online tool that allows you to create mind mapping and brainstorming diagrams. A free version is rather limited and it lets you create 5 popplets. But, if you don’t plan storing live popplets, a free option should be more than enough. Plus, you can export them as a jpg or pdf file if you want to save your students’ work. It’s an excellent tool for mindmapping and presentations for individual, class/group or pairwork. The tools allows you to use a range of formats such as video, word, pdf. Unfortunately, you can’t attach any audio file. At least for the time being.

What did I use POPPLET  for with my students:

For a collaborative class project THE MUSEUMS OF EDINBURGH (class trip) http://popplet.com/app/#/2667368

  1. For individual presentation COUNTRIES (students shared their popplets with me)
  2. For group presentations on INSPIRATIONAL WOMEN

I also used popplet whilst studying with teaching English with technology course for presentations:

  1. In collaboration with my partner Sayed – Dos and DON’Ts on TECHNOLOGY IN CLASS 
  2. Individual – HOW TO USE VIDEO in CLASS

You can make your popplet totally private or totally public. There is a collection of public popplets you can use freely although you need to check whether the content is appropriate. No copyright issues unless you are inserting a physical file.

HOW TO USE POPPLET.

Finally EASEL.LY –  a program not maybe as attractive as Glogster but FREE.

You can either build your own infographic by dragging and dropping pre-made design elements on the in-built canvas or you can use a blank canvas or build upon one of Easel.ly’s themes. If Easel.ly doesn’t have enough pre-made elements for you, you can upload your own graphics to include in your infographic. Your completed infographic can be exported and saved as PNG, JPG, PDG, and SVG files.

I’ve come across it quite recently and used it, successfully in my opinion, with my students, for EMPLOYERS’ ENGAGEMENT EVENT in June 2016.

HOW TO USE EASEL.LY
OTHER TOOLS

save the trees – go paperless !!!!!!!!!!!!!

Print Friendly, PDF & Email

save the trees – go paperless !!!!!!!!!!!!!

Going paperless – a dream or a real possibility? I am currently using Planbook and Box for communication and storage. I have my Blog which students can use for extended learning. So other steps or what different steps should I take to go paperless? Which platform would be the best option for my students?


EASEL.LY – an excellent tool for creating VISUALS such as infographics or posters.

Print Friendly, PDF & Email

I was researching for a good tool for creating visuals and, although there are loads of nice programs available, they are either paid or limited in options I need  or too complicated to use.

EASEL.LY is a fantastic tool for creating posters and infographics. There is a fair-enough 🙂 free version that you can use with your students. They will need to set up an account, create a poster or infographic and download it as pdf or share as a link.

Using easel.ly is really straightforward, just drag’n’drop images, cliparts, shapes or text. Although for some, a free option is rather limited in images, you can make it up by uploading your own images.Yes, there is an option like that!!!

Watch a video on how to use EASEL.LY.

I used the program for posters for Employers’ Engagement Event in our college. Just have a look at some of them. AWESOME, AREN’T THEY?

GOOD WEBSITES FOR WRITING

Print Friendly, PDF & Email

Boy hand with pen writing on notebook Max Garçia via Compfight

A collection of short, but very helpful, tips on writing covering Sentences, Paragraphs and essay writing.

Excellent site with interactive information on writing a research. Suitable for more advanced levels and Academic English.

A collection of interactive activities for organising, planning and editing writing (letters, paragraphs, essays).

A collection of short but very useful tips on writing.


ONLINE TOOLS FOR INDIVIDUAL AND COLLABORATIVE PROJECTS

Print Friendly, PDF & Email

POPPLET http://popplet.com/ – a very intuitive and user friendly application for mind-mapping and presentations. Uses a range of media – word/pdf/jpg documents or videos. Available as a mobpoppletile app as well. Ideal for individual and group projects and short presentations.

This is an example of a collaborative project The Royal Mile Museums (a trip, worksheets, a popplet presentation)prepared by NC4 ESOL for Employability students –

Click to see it http://popplet.com/app/#/2667368

See the tutorial how to use popplet for collaborative work

MY OPINION: 5/5

PADLET https://padlet.com – another great tool especially for collaborative projects. Uses a range of media – word/pdf/jpg documents, videos or audio files. Available as a mobile app as well.

This is an example of a padlet about TRADITIONS prepared by NC4 ESOL for Employability students – http://padlet.com/bwerner/ub312s8fw0q7

padlet
Watch a tutorial on how to use padlet:

MY OPINION: 5/5

THINGLINK https://www.thinglink.com/ – one of my favourite tool, excellent for projects based on research. Incorporates various media – documents, pictures, videos. Excellent for presentations

Projects about sports – this one is about cross-country skiing. Click on different icons to see attached media https://www.thinglink.com/scene/356848057582616577

Watch a tutorial on how to use thinglink:

MY OPINION: 5/5

SCCOP.IThttp://www.scoop.it/an excellent tool for collecting (scooping) material online. Excellent for research. This is a screenshot of my scoop.it with 5 different topics (highlighted). The program collects what is available online related to the chosen topic.

scoop.it capture

Unfortunately, now you can create only one topic for scooping (used to be 5).

NC4 ESOL for Employability students set up their accounts to search the materials on Scottish Traditions. This how their scoops might look like:

Watch a tutorial on how to use scoop.it

MY OPINION: 5/5


THREE TOOLS FOR SPLITTING PDF DOCUMENTS

Print Friendly, PDF & Email
  1. SMALL PDF  – good if you are in a hurry; no need to download anything; you can use it on your work computer. Also available as a chrome app for chrome users.


small pdf

How to split pdf and extract pages? Easy peasy, trust me.  Have a look .

My opinion: 5/5

2. I LOVE PDF –  no need to install a set up program; little bit more limited I think but also nice.

small pdf


My opinion: 4/5

3. SEJDA very nice layout; no need to set it up. Free to a certain extent (see https://www.sejda.com/pricing). Nice feature of converting A3 into A4 J

sejda pdf


My opinion: 4/5


A WONDERFUL TOOL TO CREATE LESSONS FOR FLIPPED CLASSROOM

Print Friendly, PDF & Email

Are you fed up with teaching the same stuff for ages? Are you annoyed with students asking you umpteenth time how to write a report? Would you consider asking your students to get prepared for the class at home instead of spending precious class time on theory?


FLIPPED CLASSROOM  might be the answer.

I experimented with the tool called BLENDSPACE which allows you to create canvas with activities for blended learning (flipped classroom or project based learning). I played with the tool a bit and created a lesson about Personality  for the Self-Awareness unit I teach. You need to sing up if you want to see the tasks attached to the files, comment in the comment boxes or do the quiz but you don’t need to do anything if you want to have a quick look only.